Guide coverage: patches through 1.0.12
How to Fish: Rods & Bait
If nothing bites, you are usually using the wrong bait. Each story-boss bait (empty beer can, leech bait, carrot, or fish bucket) targets one specific creature and is always consumed after that catch is removed from the hook.
Each bait can catch several creatures. The Weight column is the value the game uses when deciding which creature bites, so a higher weight is caught more often. Share turns that weight into an approximate percentage of the bait’s total catches.
Fishing rods
All baits
Reeling required
“Yes” means the catch timer only advances while you reel the bait through the water. “No” means the bait can remain still underwater while you wait for a creature to bite.
Bait-consumption rate
When you drop a caught creature from the hook, this is the chance that one bait is removed from your inventory. 40% means a 40% chance per catch; 100% means the bait is always consumed. It is not the creature’s chance to escape.
Fish Bucket
| Creature | Weight | Approx. share |
| Bowhead Whale | 1 | 100% |
Hot Dog
| Creature | Weight | Approx. share |
| Rock Crab | 10 | 76.9% |
| Lobster | 3 | 23.1% |
Leech Bait
| Creature | Weight | Approx. share |
| Giant Piranha | 1 | 100% |
Beginner Lure
| Creature | Weight | Approx. share |
| Cod | 10 | 17.5% |
| Pike | 10 | 17.5% |
| Piranha | 10 | 17.5% |
| Triggerfish | 5 | 8.8% |
| Goby | 5 | 8.8% |
| Salmon | 7 | 12.3% |
| Goldfish | 4 | 7% |
| Perch | 5 | 8.8% |
| Sunfish | 1 | 1.8% |
Empty Beer Can
| Creature | Weight | Approx. share |
| Spider Crab | 1 | 100% |
Standard Lure
| Creature | Weight | Approx. share |
| Catfish | 12 | 17.4% |
| Bluegill | 10 | 14.5% |
| Yellow Boxfish | 8 | 11.6% |
| Angelfish | 8 | 11.6% |
| Needlefish Quest | 8 | 11.6% |
| Sea Urchin | 10 | 14.5% |
| Clownfish | 6 | 8.7% |
| Seahorse Quest | 3 | 4.4% |
| Bowlfish Quest | 3 | 4.4% |
| Blue Shark Quest | 1 | 1.5% |
Beginner Boss Lure
| Creature | Weight | Approx. share |
| Sunfish | 10 | 50% |
| The Old Pike | 10 | 50% |
Professional Lure
| Creature | Weight | Approx. share |
| Sengarat | 10 | 12.8% |
| Red Snapper | 10 | 12.8% |
| Tigerfish | 10 | 12.8% |
| Parrotfish | 10 | 12.8% |
| Bass | 10 | 12.8% |
| Halibut | 10 | 12.8% |
| Flying Fish | 5 | 6.4% |
| Eel | 5 | 6.4% |
| Voxelfish | 3 | 3.9% |
| Dripper Quest | 3 | 3.9% |
| Tuna | 1 | 1.3% |
| Seahorse Quest | 1 | 1.3% |
Carrot
| Creature | Weight | Approx. share |
| Pufferfish | 1 | 100% |
Standard Boss Lure
| Creature | Weight | Approx. share |
| Blue Shark Quest | 10 | 100% |
Coconut
| Creature | Weight | Approx. share |
| Bing Bong Quest | 1 | 100% |
Scientific Lure
| Creature | Weight | Approx. share |
| Stonefish | 10 | 25% |
| Blobfish | 10 | 25% |
| Anglerfish | 10 | 25% |
| Oarfish Quest | 6 | 15% |
| Superdwarf Fish Quest | 4 | 10% |
Professional Boss Lure
| Creature | Weight | Approx. share |
| Tuna | 10 | 100% |
Scientific Boss Lure
| Creature | Weight | Approx. share |
| Goblin Shark Quest | 10 | 100% |
All 48 creatures Check which bait each boss needs
Quick answers
Does bait get used up?
Yes. Every bait lists a loss rate per catch: the Beginner Lure loses 35% of the stack per catch, the Standard Lure 30%, and quest baits such as the Empty Beer Can or Leech Bait are consumed at 100%.
Why does one bait need reeling and another does not?
Baits marked reel must be reeled in while the creature is hooked; the others hook on their own. The table shows this per bait.
Which bait catches a specific creature?
Open the bait row: each one lists the creatures it can hook and their share of the catch, so you can see how likely the target is.
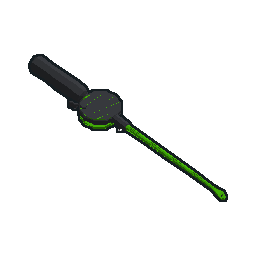 Crab-Fishing Rod The first-island rod with no reel; accepts only crustacean baits like the Hot Dog and Empty Beer Can.
 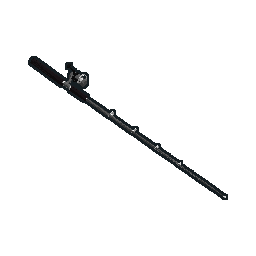 Fishing Rod Has a reel and is used from the Forest island onward; accepts every bait, including boss-specific baits.